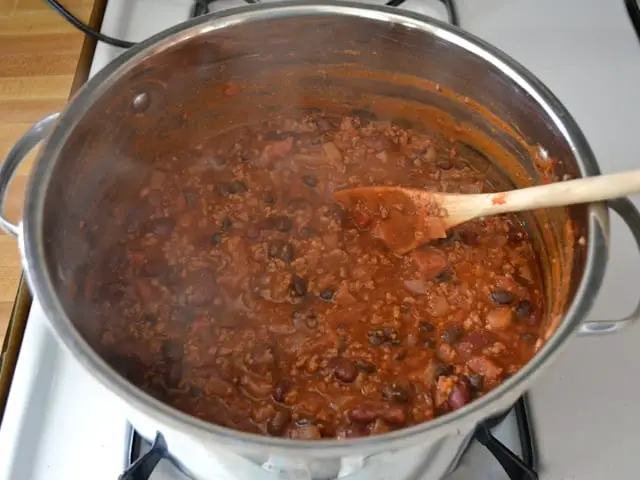
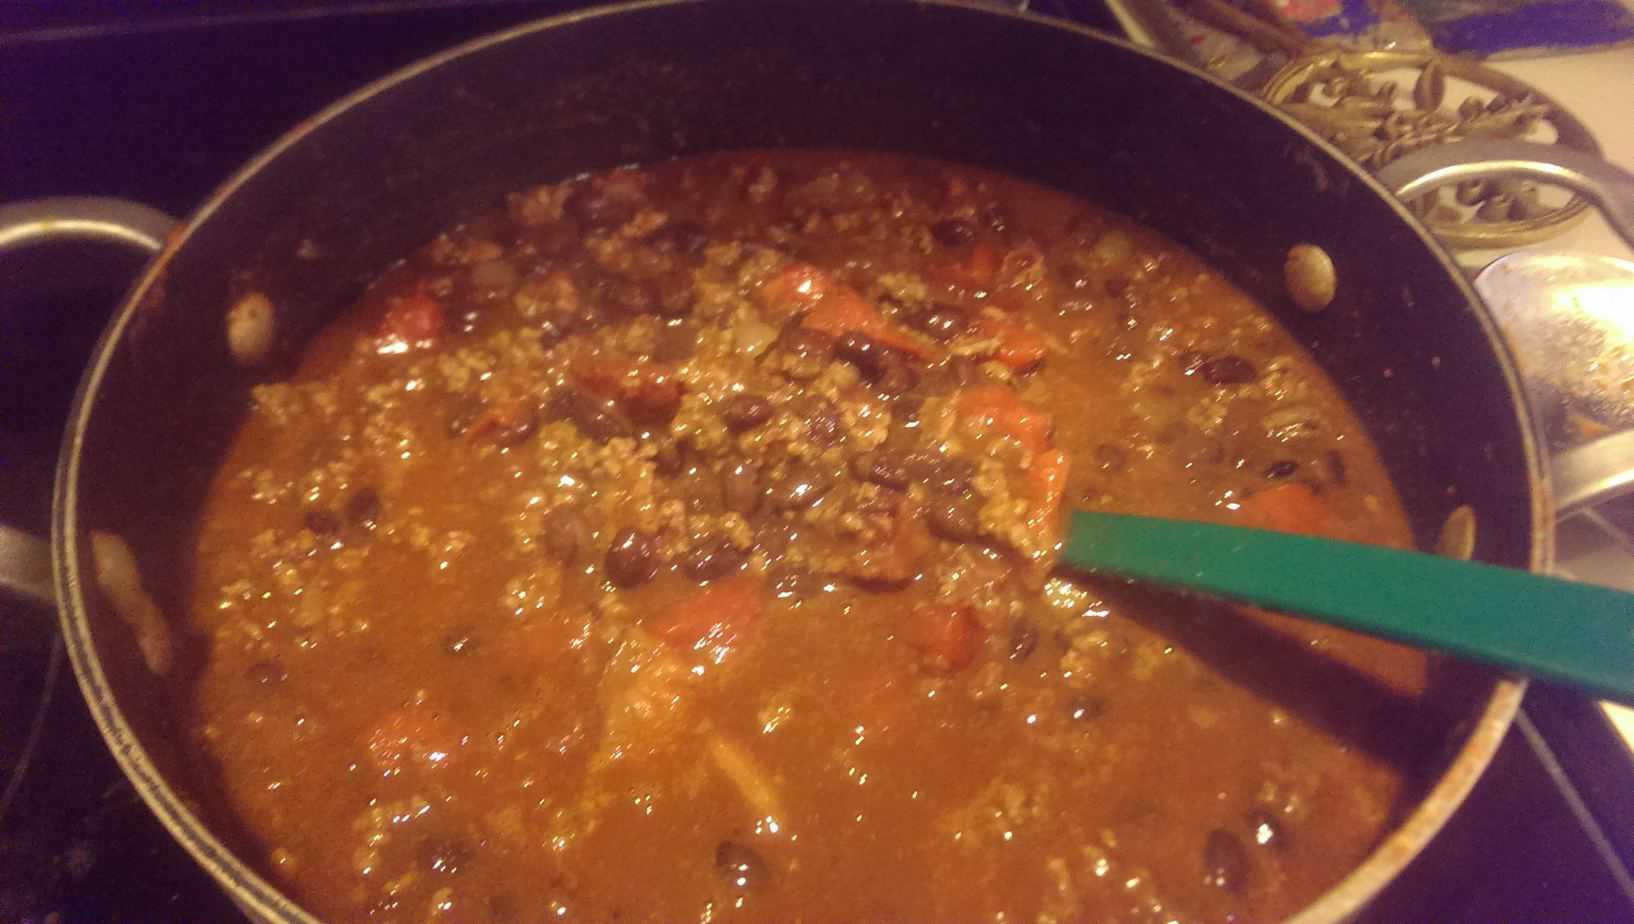
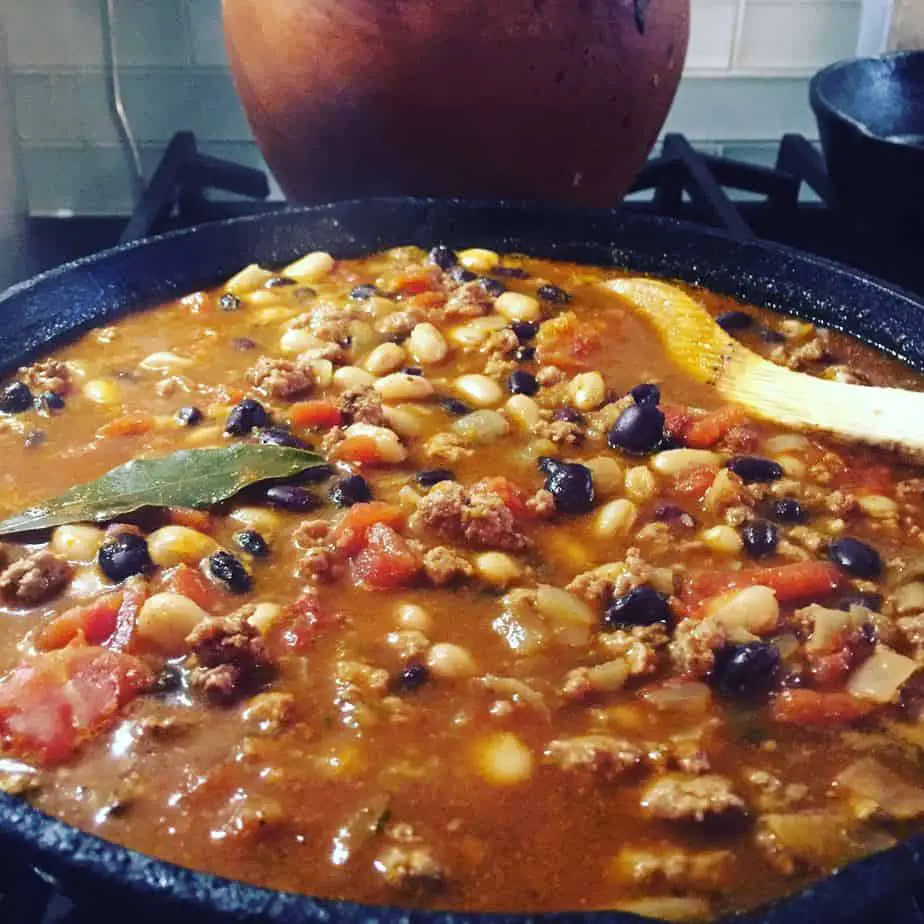
I can’t think of enough good things to say about chili. A thick, hearty chili is a great all around food with a wide range of variations to help it please any palate. It’s nutritious, with a great balance of protein, carbohydrates, and vegetables, making a complete meal in one dish. Plus it’s the perfect meal to keep you warm in the fall and winter.
Chili is one of my favorite dinners after a long day at work because it can easily cook in the crockpot while I’m busy. It’s also a favorite food of mine for entertaining because everybody loves it and it’s easy to feed a crowd. Here are some of the chili recipes I make on a regular basis.
- Traditional Chili with Ground Beef, Kidney Beans and Tomatoes
- Spicy Andouille Chili with Black Beans and Chocolate
- Vegetarian Chili with Kidney Beans, Tomatoes and Mushrooms
- White Chicken Chili with Cannelloni Beans
- No Bean Chili with Ground Beef
As you can see, there are lots of different kinds of chili you can make, but one feature is critical no matter what variety you choose; good chili is nice and thick.
Nobody likes watery chili! There are a few easy ways to thicken chili. Choose the one that works for you based on the way you’re cooking your chili, the ingredients you have on hand, and the taste of your chili. Any of these methods will thicken your chili nicely.
- Method 1 – Natural Reduction
- Method 2 – Thickening With Flour
- Method 3 – Thickening with Cornstarch
- Method 4 – Thickening with Cornmeal
Any of these methods will thicken your chili nicely. My favorite method is natural reduction because it adds nothing to the chili that isn’t already there. The downside to this method is that you really have to attend the chili for an hour or two to monitor the progress and prevent overcooking. This method also doesn’t work as well if you are making chili without beans, because it involves using some of the natural bean starch for thickening. However, simmering can thicken any chili, with or without beans, if you have the time.
If I’m away from home most of the time my chili is cooking, I will use method two or three, depending on what I have on hand. Each of these methods works equally well and thickens your chili fairly quickly.
I use the cornmeal method only as a last resort, such as if I am out of flour and cornstarch. This is a personal preference because I can taste the cornmeal in the chili, which is not appealing. However, some people prefer this method over others because they like the taste the cornmeal imparts to the chili.
Fortunately, none of these methods requires a lot of additional ingredients and any chili cook can use them easily.
If you’re cooking chili in a slow cooker or a crock pot, you can still use these same methods. Turn the crock pot on high and remove the lid to simmer—but be careful because this method requires you to watch the pot and make sure that it doesn’t reduce too much. If you don’t have that time (you picked the slow cooker for a reason!) then use one of the other methods: flour, cornstarch, arrowroot powder, or cornmeal.
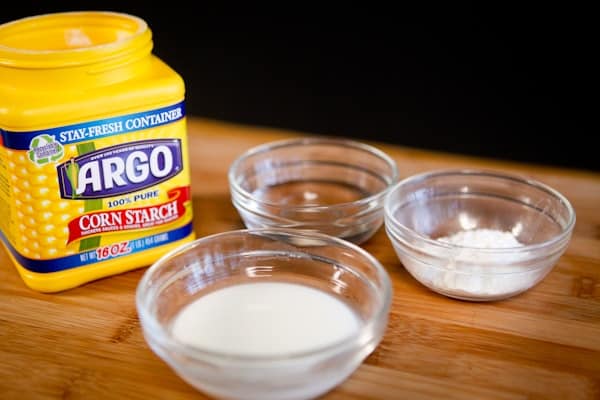
Here are some different ways to thicken your chili and what you’ll need to get started:
- Method 1 – A bowl, a slotted spoon, a fork or potato masher and some time.
- Method 2 – Measuring cup, water, bowl, spoon, flour and a whisk
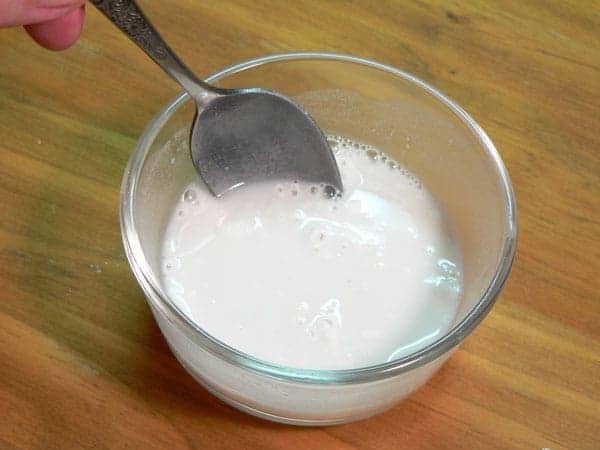
- Method 3 – Measuring Cup, water, bowl, cornstarch and a whisk
- Method 4 – Cornmeal and a measuring spoon.
How to thicken chili? Let’s Get Started
– Method One: Natural Reduction
The best way is natural reduction because it adds nothing to the chili that isn’t already there. The downside to this method is that you really have to attend the chili for an hour or two to monitor the progress and prevent overcooking. This method also doesn’t work well if you make chili without beans because it involves using some of the natural starches in the beans for thickening. However, if you have the time, simmering can thicken any chili, with or without beans.

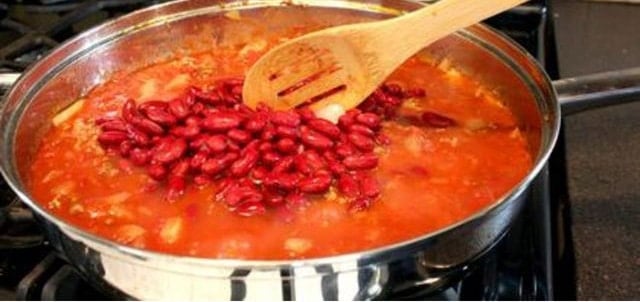
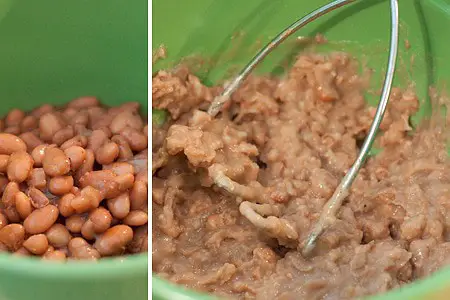
After cooking your chili covered to about 80% done, remove the lid. Using a slotted spoon , remove a big spoonful of beans, and transfer to another bowl.
Step Two: Mash the Beans
Using the fork or potato masher, thoroughly mash the beans. Add the mashed beans back to the chili and stir in thoroughly.
Step Three: Allow Chili to Simmer
Allow the chili to continue to cook until done and uncovered. As the starches from the beans release into the chili, it will begin to thicken. Allowing it to continue to cook uncovered will reduce the liquid, thickening it further. Allow the chili to just simmer on low heat. Boiling the chili too hard will cause it to reduce too quickly, and possibly scorch or stick to the pan. Keep an eye on the chili; do not allow it to thicken too much.
If you don’t have time to watch your chili, the next easiest way to thicken it is to add tomato paste. This will boost the flavor of your chili and is a great way to achieve thick chili.
– Method Two: Thickening with Flour
Flour is a really good option to add to your pot of chili because you most likely already have it on hand. Any type of flour will work, from all-purpose flour to corn flour to gluten-free options—make sure the one you use is suitable for everyone who will partake! Flour is a great way to get rid of soupy chili.
Mix ¼ cup of cold water with 2 tablespoons of flour in a bowl until smooth. This is called a slurry. This amount is enough to thicken about two cups of excess liquid. If you have more than two cups of excess liquid, double the amount of flour and water.
Step Two: Add Liquid from the Chili
Add a large spoonful of hot liquid from the chili to the bowl with the flour and water. Mix until smooth, mashing out lumps as needed.
Step Three: Add the mixture back to the chili
Add the slurry mixture back to the pot. Stir until the slurry is mixed thoroughly back into the chili. The slurry will cause the chili to thicken as it continues to cook. Let the chili simmer for at least ten minutes to ensure that you cannot taste the four. Allow the chili to simmer until it reaches desired thickness.
– Method Three: How to Thicken Chili With Cornstarch
Cornstarch is a great thickening agent and is easy to find. If you don’t have cornstarch, you can use arrowroot powder, which has been used to thicken recipes for hundreds of years.
Step One: Make Cornstarch Slurry
This method is very similar to using flour slurry. Mix 2 tablespoons of cornstarch with 2 tablespoons of cold water. Mix until combined. This amount of slurry will thicken up to two cups of excess liquid in your chili. If your chili has more than two cups of excess liquid, double the amount of slurry.
Step Two: Mix in the Slurry
With cornstarch slurry, it is not necessary to add liquid from the chili to the slurry first. Just be sure the cornstarch is thoroughly dissolved into the cold water before adding it to the chili.
Step Three: Simmer until thickened
Bring the chili back to a boil. Continue boiling slowly until chili reaches desired thickness. Cornstarch is not as likely to flavor your chili, even if you only let it boil for a minute or two.
– Method Four: Thickening with Cornmeal
Step One: Add Cornmeal to the Chili
Measure two to three tablespoons of cornmeal directly into the chili and stir thoroughly.
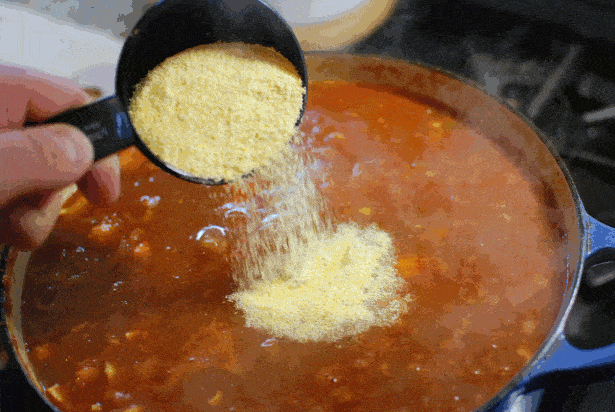
Step Two: Simmer
Allow the chili to simmer for another 10 minutes. If the chili is not sufficiently thickened, add another tablespoon of cornmeal and thicken another 10 minutes.
If you don’t like the taste that cornmeal adds, then there are other options. Masa Harina is a dried corn dough that is used to make corn tortillas. It’s more finely ground than regular cornmeal, so it might not add as much of the texture you don’t like about cornmeal but it does add that corn flavor. It does also take a little longer to thicken. Adding masa harina to that much liquid will help you deal with a thin chili.
You can also try tortilla chips or corn chips —they’ll add a nice crunch and help absorb some extra liquid. Just crush up a few handfuls of chips in and sprinkle them into the pot with your chili. They’re also great on the side!
Conclusion
Chili is easy to make and delicious, and it’s always a crowd-pleaser. You can cook it over the stove or let a crock pot do the work while you’re out and about. However, sometimes there’s too much liquid in chili and you need to find ways to get it thicker. I find that my chili always needs a little help to thicken properly, and all of these tricks make it easy to get my chili to the perfect thickness every time. It makes a great meal even better!
Do you usually have to thicken your chili? Which of the methods for thickening chili do you think you will use? Do you have other tricks for thickening chili? Let us know in the comments section.